8 Stretches for your Tight Shoulders!

If you are like millions of others in our very busy society, you may find that you hold a lot of your stress in your shoulder region. We have all heard the phrase "Don't carry the weight of the world on your shoulders". Despite our best intentions, we are likely to do this every now and again. The more we have going on in our lives, the more we are vulnerable to changing circumstances. When we feel vulnerable, we tend to try and protect ourselves from full exposure. A lot of us carry this protective stance in our upper body. By tensing up in our chest, shoulders and neck, we feel that we are protecting our hearts from experiencing hurt. Unfortunately, not only does this tension not protect us from the changing circumstances of life it also translates into a myriad of painful physical effects on our bodies. So it's important we pay attention to tight areas and work to find release. If your shoulders are tense, you may find it difficult to sleep, sit tall for long periods of time, and breathe fully. The more balanced you are in emotionally protecting yourself and also staying somewhat vulnerable and open to change, your physical stance, posture and ailments will be dramatically improved.
Use these stretches to help reduce these symptoms and give yourself a little more space to breathe and relax!
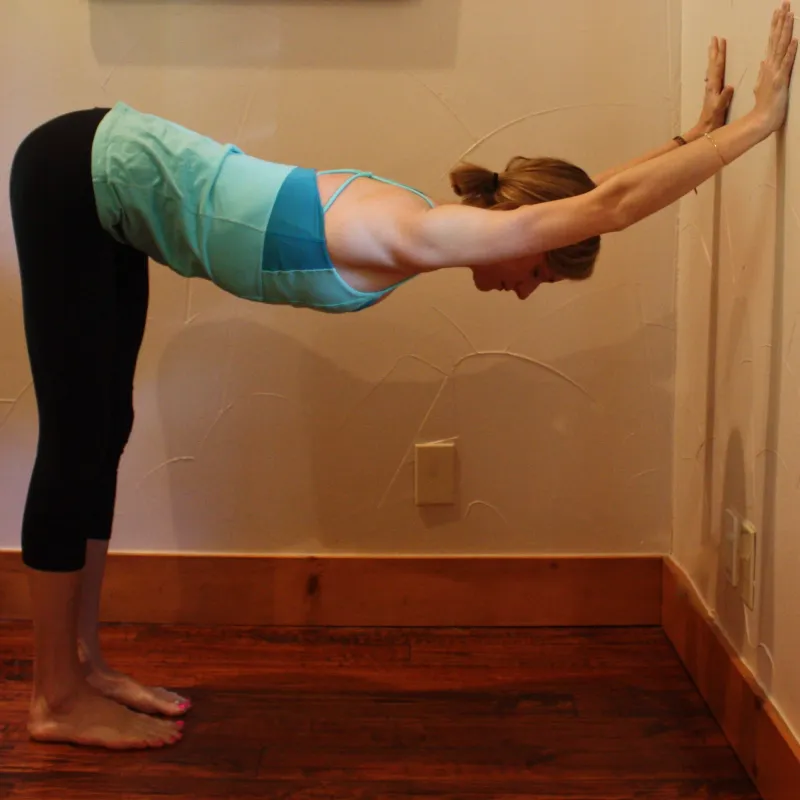
At the Wall
1. Downdog/Dolphin Poses at the Wall: Measure your distance out so that the ankles are below the hips and you have space to fold at about 90 degrees. This is also a great release for the low back. When you come to your forearms the intensity will grow. Be sure to melt your heart little by little and breath through the sensation. Stay in each of these for 1-2 minutes.

Seated Stretches:
There are so many nice stretches you can do from a seated position of your choosing. I chose Sukhasana (Easy Seated Pose) for these.
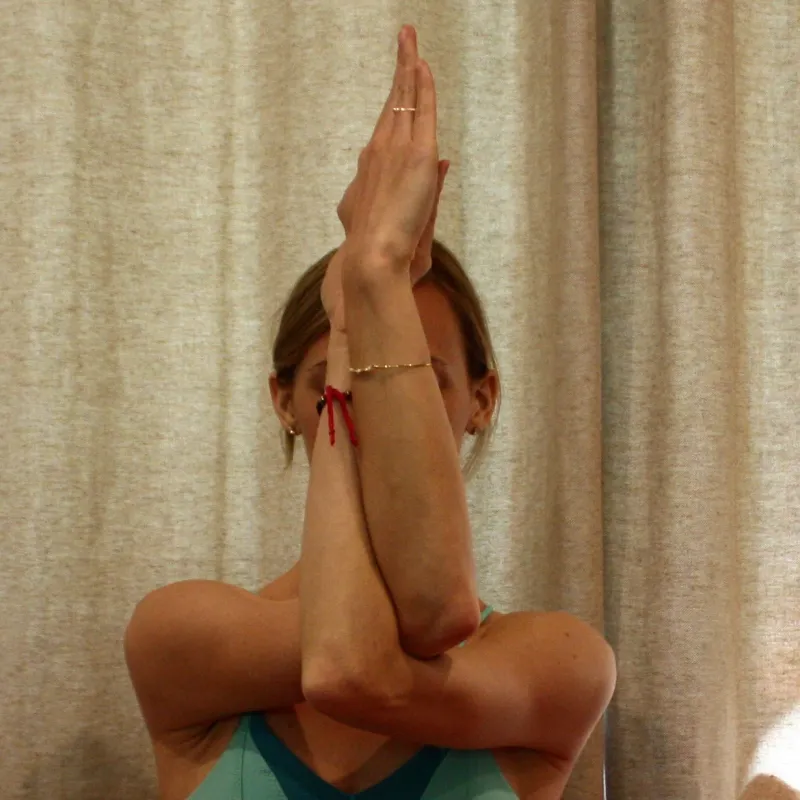
2. Eagle Arms: This one is very common in our flow practice, but sometimes it's nice to just sit and focus on this nice opener for the upper back and shoulder heads. Begin by crossing the right arm over the left, continuing to wrap until the palms come together to touch. If you cannot get the palms to connect, you can either grab either shoulder or bring the backs of the palms together. Never force a shape to happen in these poses. Always stop when you find the perfect amount of intensity for YOU. Begin to lift the elbows away from the chest until you feel a nice expansion between the shoulder blades and if your hands are together, press the pinkies toward the front of the room to intensify the stretch. Hold 5-10 deep breaths, then switch to the other side.

3. Cowface Arms: This is another common shoulder stretch that may be incorporated into a flow, but is also a nice seated stretch. Depending on your shoulder flexibility, you may want to have a strap or an old neck tie handy to get the connection between your hands (I used my shirt in the picture below). Take your right hand and pat yourself on the upper back as best you can. You can choose to stay here in this first step by taking the left hand to the right elbow and breathe into the back of the right arm. If you feel okay to deepen a little further, you can begin to take the left hand to the low back and then possible connect the hands. I always need a prop on one side of this pose. You are welcome to take a forward fold here as well if you have a little more flexibility.Take 5-10 breaths here then switch to the other side.


4. Tricep Pull: I learned this stretch during a training intensive with the awesome Dice and Briohny when they were at my studio late in 2013. To get into the stretch, bend your right arm and bring the back of the hand into the low back (sacrum area). Take the left arm, reach across your chest and grab the tricep of the right arm. Begin to pull the tricep toward the front of the room and at the same time, press the right elbow toward the back of the room. Finding a nice balance between the two. Once you have a good amount of sensation, begin to drop the left ear down toward the left shoulder until you feel a good stretch through the side of the neck. Hold for 5-10 breaths and then switch to the other side.

Table Top Stretches:

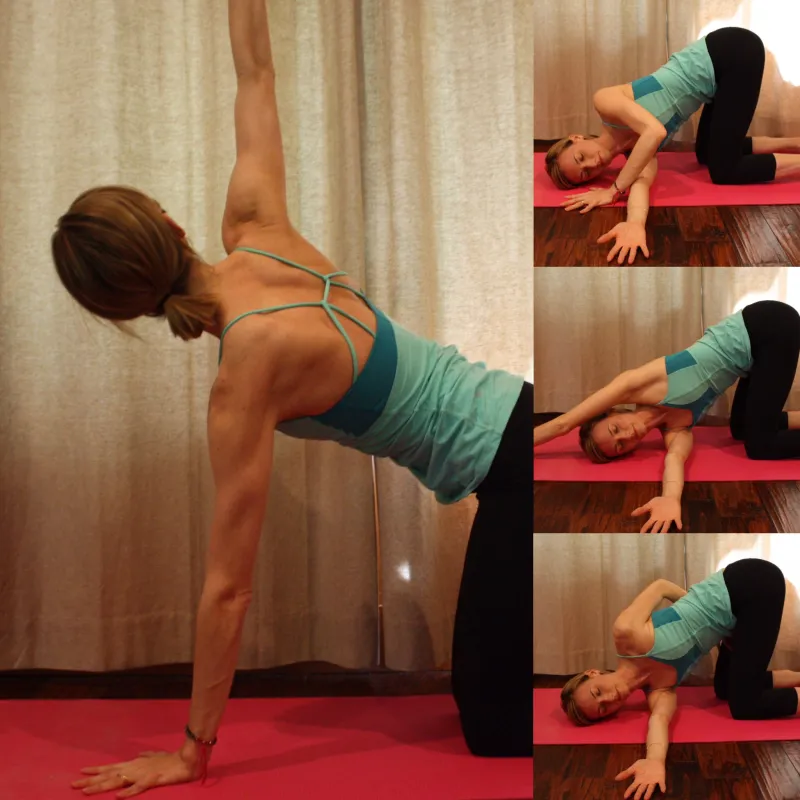
5. Threaded Needle: This is a nice twist in the spine and releaser for tension held in the upper back, neck and shoulder regions. Begin by coming into a Table Top position, maybe moving with your breath for a few rotations of Cat/Cow to loosen the spine. Come back to a neutral spine, inhale and lift the right arm up to the sky, as you exhale draw that right hand all the way across the mat and over to the left side of the mat until your shoulder is grounded and you can lie your head on the floor or a block. You can take the left arm and reach it overhead or wrap it around your back. Take 5-10 deep breaths then switch to the other side. To lift out of it, place the left hand at eye-level and then press yourself back up.
6. Anahatasana/Melted Heart: This can be done on the floor or with two blocks under the triceps if you're pretty open and ready for more sensation. From your table top position, begin to walk the arms far out in front of you and gradually begin to melt the chest towards the floor while keeping your hips high. You can keep the arms extended or bring them together in prayer above the head to intensify the stretch. Another deeper option is to use two blocks, one under either shoulder (you can see a visual of it in this photo here. Stay for 2 to 3 minutes and then rest on your belly with your arms along side your body or in a childs pose.

7. Shoulder Rollover: Come onto your belly and extend your right arm out to the side, level with your shoulder, palm facing up or down depending on your comfort. Bend the opposite elbow while drawing the hand under your shoulder. Push into the opposite hand and begin to roll open to the side of the extended arm. You can also step the foot up and over or just keep your legs stacked and slightly bent. If you feel good with one knee up, you may continue to roll until you are able to get both knees up - again, don't force anything. It should happen organically in your body as you breathe. If you have the shoulder flexibility you may be able to reach back with your left arm and interlace the fingers of both hands. If not, just keep the left arm relaxing at your side. If it hurts your neck to relax your head on the floor, take a blanket or a block underneath your ear. Make sure you can breathe freely. You can remain here for two to three minutes so take your time to gently move to your deepest place in the pose. To come out just slowly roll back to the belly, relaxing the arms at the sides. Before you move to the other side, do the next pose (#8) to counter by threading the right arm under.


8. Criss-Cross Stretch: To counter the shoulder rollover stretch, take this variation of thread the needle to target the opposite stretch in the same shoulder joint. Come into sphinx pose, begin to thread the right arm behind the left until your elbow is lined up with the center of the chest. Then begin to walk the left arm out to the left side until the elbow lines up. You can keep the head lifted or relax it on a block/the floor. Hold this pose for about 2 minutes then go back to the rollover on the other side.


Enjoy!
--
Need a timer? I highly recommend the CDN TM30! It’s got a vibration setting that’s just the right subtle reminder to ease out of the posture.