Pose Breakdown | Saddle
Saddle Pose!A personal favorite. There's nothing like a long release in this pose. The stretch through the hip flexors, low back and fronts of the ankles. However, it hasn't always been on a pose I look forward to. I remember one of the first yin classes that I attended, we were instructed into this pose. As soon as I tried to sit down in between my heels my ankles and knees cried out in agony. I'm pretty sure the girl next to me heard them scream! As I barely made my way into anything near to this shape, that same girl next to me comfortably reclined back into the full variation of the pose. It was baffling. It took me a year or so, but I kept showing up to this pose when it made its way to me. Each time, I found my way millimeter by centimeter deeper until my body decided to organically fall all the way to the floor. Now, everyone is built differently - so your final pose, will look different than mine. And that's a beautiful thing! So let's find YOUR perfect variation of this pose...DirectionsSit back onto your heels (toes untucked) to start. You can stay here for a few moments to open up the anterior sides of the ankles. After about 30 seconds or so, begin to lift your hips and open your feet wider than the hips, while keeping the knees about hips distance from each other. Begin to sit back onto a block or two to start. If you find plenty of sensation with 1-2 blocks, stay supported the whole time. If you are able to drop the hips all the way down in between the heels, make sure there is no pain in the knees or ankles - only a deep stretching sensation.
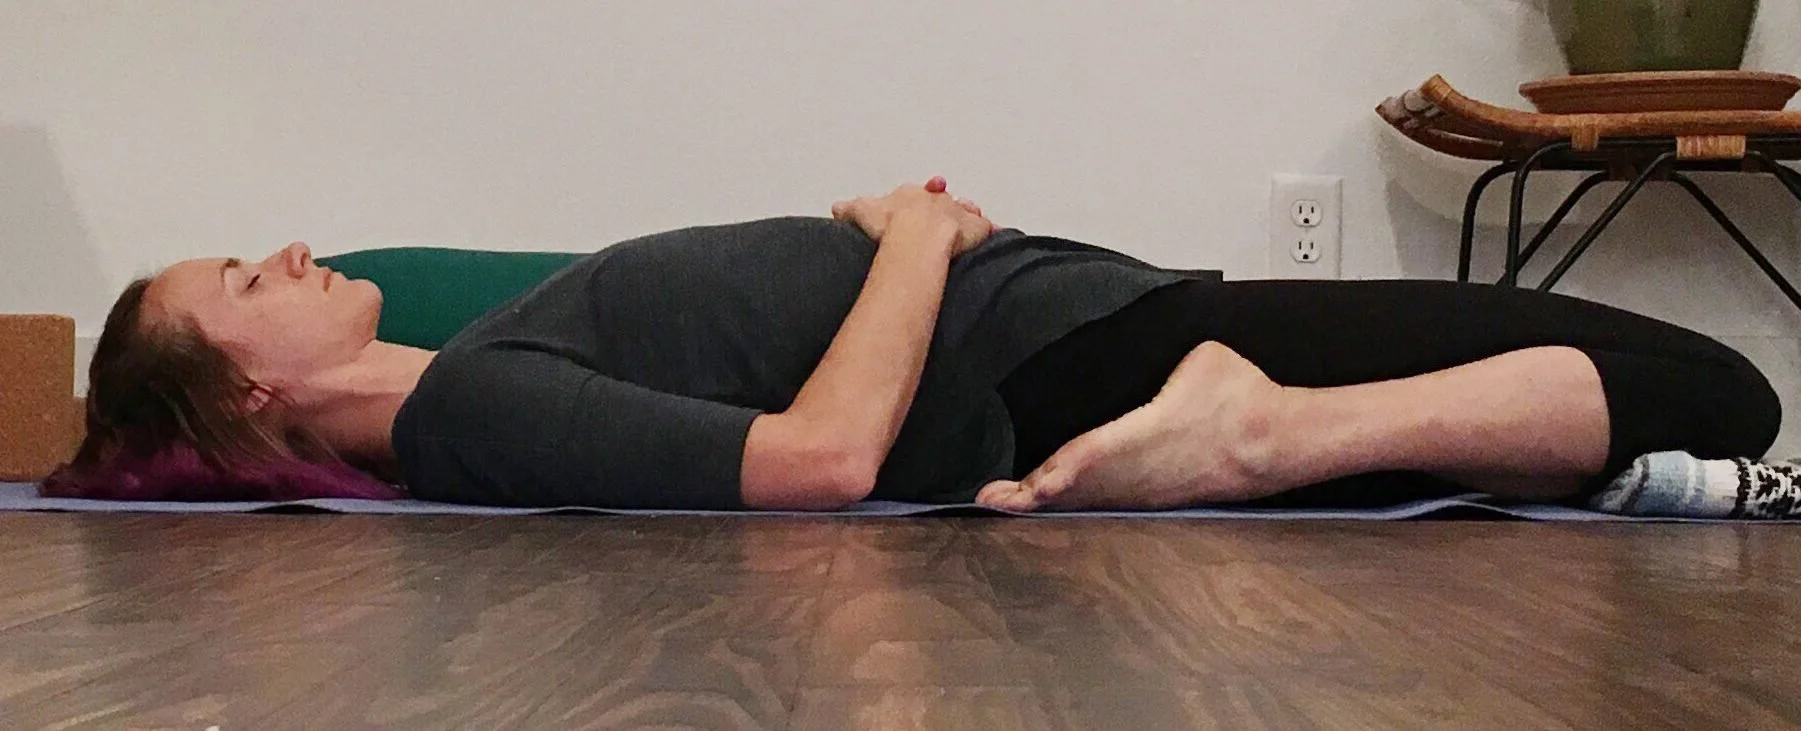
 Once you find a good amount of sensation, pause and breathe. From here, you can choose to stay upright as you are or to recline. If you want a deeper stretch across the front of the body, begin to walk your hands behind you leaning back into them. Pause here and then decide if you'd like to go deeper.If you are supported on a block, only go back as far as your forearms or to a bolster (pictured). This will help eliminate an over-extension in the lumbar spine (which would occur if you were to go all the way down while the hips are propped.)If you are NOT supported on a block and feel like reclining, you can release as far as the floor behind you. Don't get in a rush! You have plenty of time here. If your knees start to lift up at any point, you have gone too far. Come out of the variation of the pose until your knees can come back down to the earth.

 Notes
Notes
- DON'T RUSH - The point of the posture is to find resistance and breathe through it. Rushing beyond your sensations is not only physically unsafe but it's robbing you from the true experience of release.
- DETAILS - Make sure that your toes stay pointed toward the back of the room rather than splaying out to either side of you. Small details like this will keep your knees and ankles safe.
- COMPRESSION - To lessen compression in the low back when reclining, pick up the hips and scoot them forward so that your lumbar spine can lengthen out a bit more.
Variations
- Rolled blanket under the knees | If you have knee sensitivity, you can support your body by bringing a blanket or small bolster under the knees. This just adds a little cushion for the boney parts of the knee joints to rest into.
- Half Hero/Saddle | If the full posture (with both knees bent) is too much for your body, take just half of the pose at a time. Start with the one knee bent and keep the other leg straight out in front of you or bent with the foot grounded in front of your hips. Make sure you do both sides evenly in time and any added variations.
BENEFITS
- Creates space in the low back/sacrum area, which tends to be compressed from sitting with rounded spines much of our day.
- Releases the fronts of the legs and hips; Stretches the muscles that are needed for strong internal hip postures (Warrior 1, Crescent lunge, Bridge pose, etc)
- Helps create balancing release for those that struggle with restless leg syndrome
ENERGETICS
- Stimulates the urinary, spleen, stomach and kidney meridian lines.
- Gently energizes: This posture is a backbend, but one that helps to restore mobility in the lower back as well as a small release of stress in the upper back. This is a great posture to do if you are in the midst of a pile of paper work and need a mental boost. But it's not too energizing so that your heart will be going to fast (as with wheel pose) to focus. It can also have a very balancing effect because in a sense this pose also calms the mind. Closing your eyes here for a few moments can be a powerful tool of meditation and relaxation.
USE CAUTION: Contraindications for this posture include...
- Vertebral issues in the lumbar spine/SI joint. Be sure to support yourself using props so you are careful not to strain these already sensitive joints.
- Numbness. If you start to feel tingly, please be sure to back out of the pose until this numbing sensation ceases. You do not want to put pressure on your nerves in this way as it will damage functionality over time.
- Knee/Ankle sensitivity or injury. If you have any current or previous injury or pain in these joints, steer clear of this posture until you can safely enter with no pain. Seek your doctor's advice if you are unsure.
HOLD: 3-5 minutes, depending on your own personal needs. Come up very slowly from this posture (as in any yin pose). Allow your spine to lengthen back up as slowly as it descended downward.COUNTER POSTURES Stretch one leg back at a time to help release the ankle into a flexed shape (counters the ankle extension in the posture) Childs pose will help to lengthen the low back out again. Roll the head side to side if your neck needs an extra release as well.